learning Building applications with C# and a Challenge! It's seems not too long ago I was laying down the words for "So Many Ways to Learn .NET in 2020", but of course it was March yesterday too. This
Are you reading the "What's New" in .NET docs? Did you know that every month, the docs team at Microsoft has a post for what's new in the .NET documentation? For each month there are new articles, updates to
azure Updating the my blog from AppService to Containers...finally I have been running the well known ghost blogging platform on Azure AppService since ghost was version 0.10, about 8 years. In fact, it was before Azure had resource
dotnet So Many Ways to Learn .NET in 2020 It's a new year and sure to be on your list, as well as mine, is learning. Here is a quick list of some .NET learning resources for you to
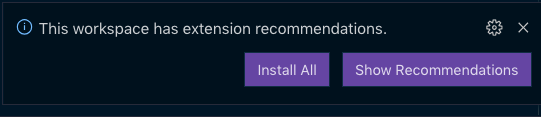
vscode Recommending VSCode extensions within your Open Source projects Do you run an open-source project? Use Visual Studio Code and its extensive set of extensions when maintaining your project or even coding day to day? If you have an
wcf Deploying WCF and .NET Core applications to a single Kubernetes cluster In my previous post, I showed how to take a WCF service and containerize it using Visual Studio. By doing so, this gives us the opportunity to push our heritage
wcf Modernizing WCF Services with containers and Visual Studio There are a number of reasons for moving long-standing .NET Framework applications like WCF, and ASP.NET Webforms to containers and then into containers or "modernizing legacy heritage apps&
github Build the code, thank the contributors! The GitHub event announced a great new feature - GitHub Sponsors. GitHub Sponsors is a new way to financially support the developers who build the open source software you use
docker Auto blogging Jekyll with Logic Apps, ACI Containers and .NET Core All related links: https://www.theurlist.com/autobloggerpost Jekyll is a very popular way to host a static site on GitHub and posting new content is a simple as creating a markdown file and then committing it to the relative repo. GitHub takes care
azure dotnet-azure : A .NET Core global tool to deploy an application to Azure in one command The options for pushing your .NET Core application to the cloud are not lacking depending on what IDE or editor you have in front of you. Visual Studio has a rich GUI interface with choices to pick pursuant to the architecture of your app
dotnet Finding your next .NET Open Source project using the command line Many years ago I wanted to jump into a project in open source but had no idea where to start. I had worked with node.js, .NET and some other
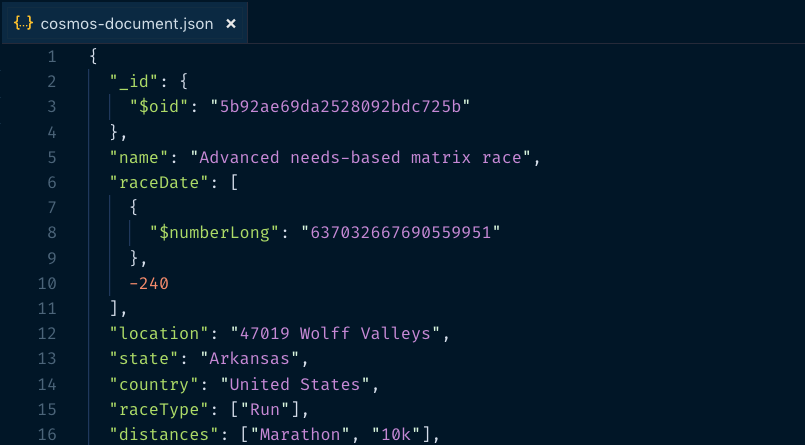
azure Using ASP.NET Core with MongoDB in containers for local dev, CosmosDB for production If nothing else is true, containers have made local development on a platform so much easier. If you want to use SQL Server for your backend just docker pull microsoft/
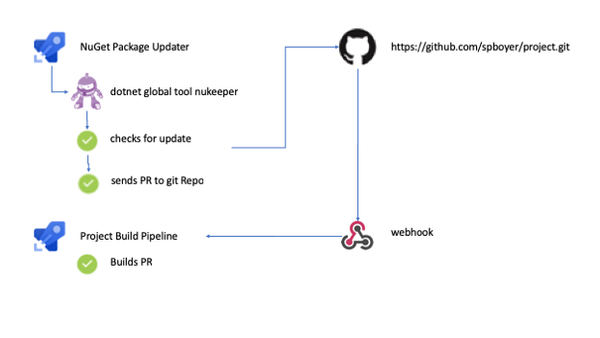
azure Using Azure DevOps Pipelines and NuKeeper to Automate NuGet Package updates Keeping your code update to with the latest references can at times be a challenge with the rate of speed third-party dependencies can revise. However, with security patches and bug
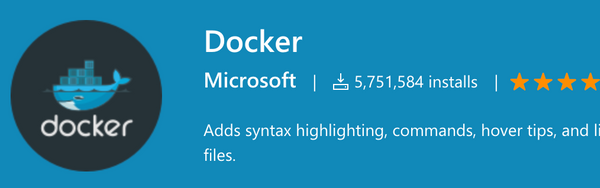
docker Exploring the Docker Extension for VS Code and .NET Core The Docker extension for VS Code was recently updated to better support .NET Core applications and the experience is super nice! The extension already has great support for building your
azure-functions dotnet new templates for serverless functions Since .NET Core was announced, I've really been loving the command line experience for .NET Core. Being able to use dotnet new to start a new application regardless of the
linux Open source tools for SQL Server on Linux I am a sucker for a great tool and even better if it's open source. Recently, I wrote up a post on why we should care about containers where I
serverless Use serverless functions and CDN to speed up API data calls ASP.NET Core 2.1 added some great features for making external API calls easier to manage when there are network failures, or the service itself might be down. Scott
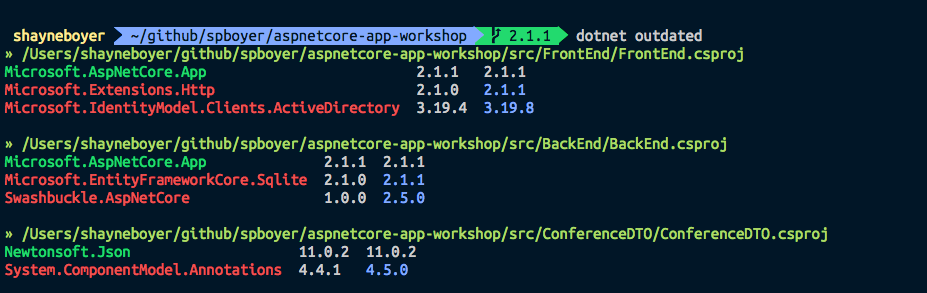
dotnet Using global tool "dotnet outdated" to check for the latest NuGet package updates Just recently the .NET Core June 2018 Update dropped and the ASP.NET Workshop I had just set up for CI/CD build was in need of an update to
aspnetcore Learning DevOps, building the ASP.NET Core Workshop, and keeping it up to date DevOps is the union of people, process, and products to enable continuous delivery of value to our end users. – Donovan Brown Build Status BackEnd Web API FrontEnd Razor Page App
azure Why should we care about containers for development There has probably been more than one time in your development career where you've spent a few hours troubleshooting an issue only to find out it was a dependency or
aspnetcore Creating RazorPage apps using the CLI While I was creating a recent test application with Razor Pages, I found myself clicking the "new file" button in VS Code too many times when I wanted to add a new Page. I really love the .NET CLI and with every
dotnetcore Searching docs using a .NET Core global tool In 2016 at the MVP Summit hackathon I put together a .NET Core CLI Tool to search for docs on docs.microsoft.com and it worked well, but there were some shortcomings. It was scoped to the project, and there was no way to
dotnetcore Cross platform code coverage arrives for .NET Core If you have done any node.js development and have been required to hit code coverage marks prior to check in or CI/CD builds; you probably have used a tool like istanbul to check your percentages. image from instabul.js.org Getting code
aspnetcore Workshop gets an update - JavaScript Services, Docker, Kubernetes and Helm! If you've been to a conference around .NET in the last year or so, there's likely been workshop available from the .NET team. Jeff Fritz, Jon Galloway, Maria Naggaga, Damian
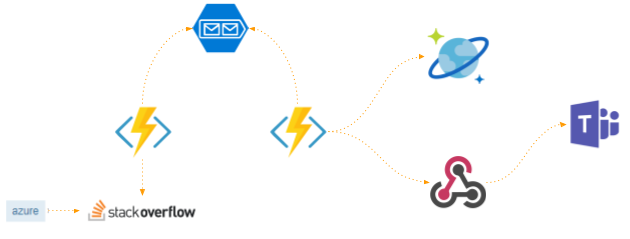
azure-functions Monitoring issues on Stack Overflow with serverless, CosmosDB and Teams One of the responsibilities we have as Cloud Developer Advocates is having an understanding of the struggles of developers using the cloud in their daily tasks. One way to do